I played league pool for almost two years before anyone told me I was chalking wrong. I was that guy who ground the cube into the tip like I was trying to drill a hole through it, spun it in circles, and then wondered why I was miscuing on draw shots three times a night. The tip was fine. My technique was the problem, and so was the chalk I was using.
Chalking a pool cue looks simple. It is one of those things that experienced players do without thinking, which is exactly why nobody ever teaches it. But done wrong, it costs you shots. Done right, with a chalk compound that actually adheres to your tip, it becomes invisible: you chalk before every shot, it stays put, and you stop thinking about miscues altogether. This guide covers the full process, from how to hold the cube to how to diagnose whether your miscue problem is the chalk or the tip itself.
If your chalk wears off after one shot, the chalk is the problem, not your technique.
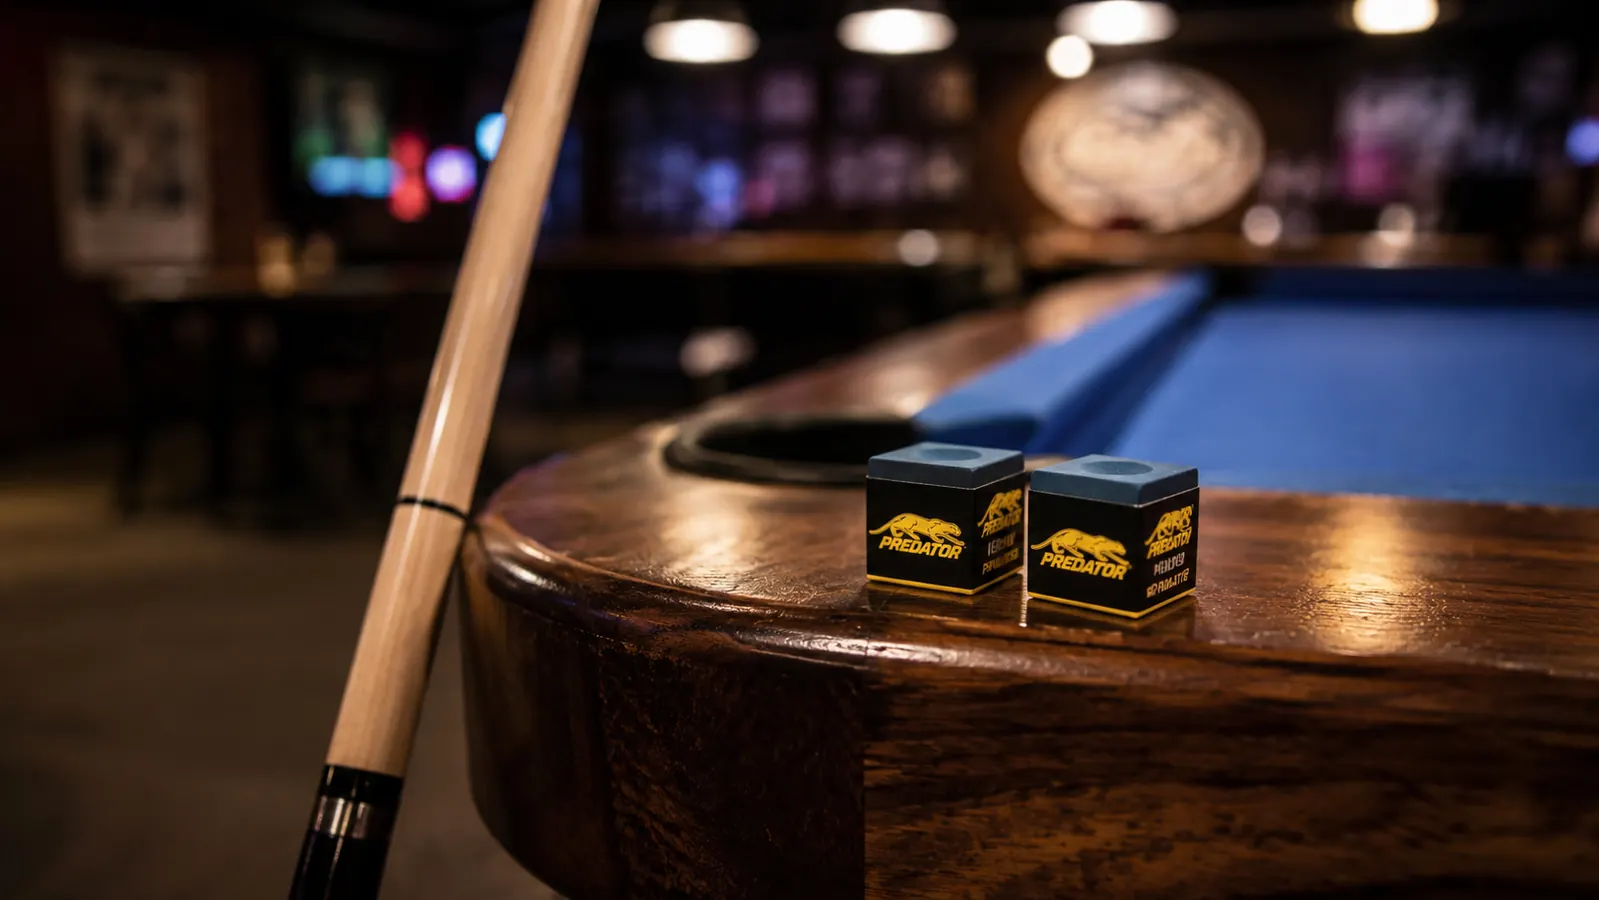
Predator Chalk (4.7 stars, 6,640 ratings) uses a softer, more adhesive compound than standard budget cubes. It applies in one or two strokes and stays on through the full stroke. Check today's price on Amazon.
Amazon Check Today's Price on Amazon →Step 1: Grip the Chalk Correctly
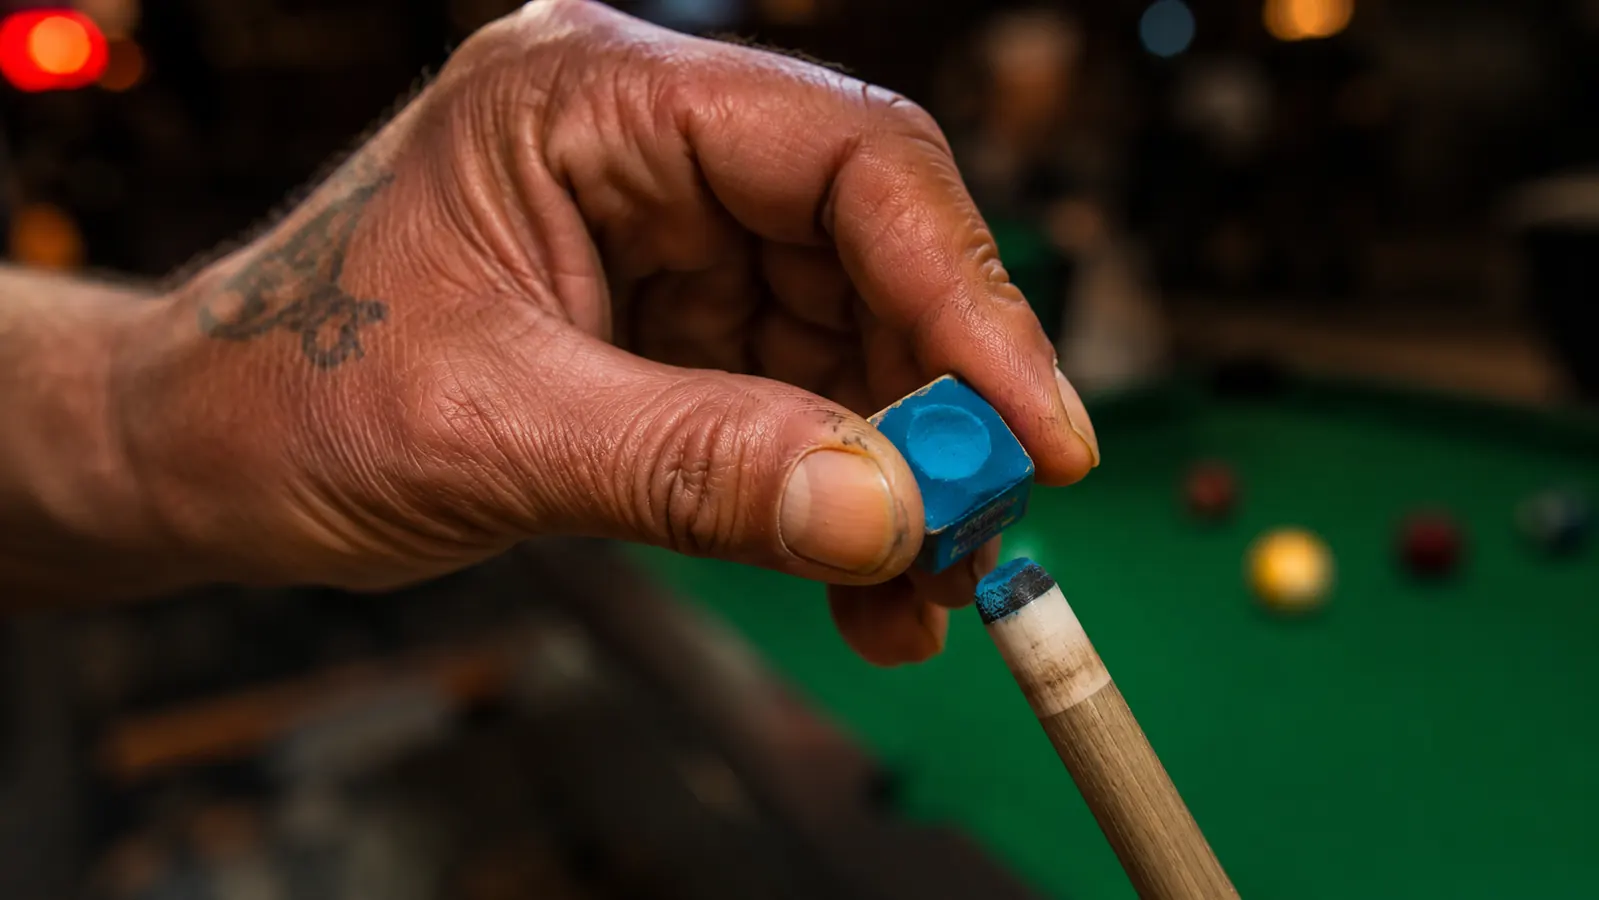
Hold the chalk cube between your thumb and two fingers on your bridge hand side. Your grip should be light, not a death clamp. You are not sanding wood. The cube needs to make full, even contact with the tip face, which only happens if you let the chalk guide itself rather than forcing it against the leather.
Most players naturally hold the cube flat against the tip, which is correct. What goes wrong is the next move: the temptation to twist and push. Resist it. The cube should move across the tip, not bore into it. Think of chalking the same way you would wipe down a lens: gentle, controlled contact.
Keep the cue elevated with the tip pointing slightly upward when you chalk. If you chalk with the cue horizontal, chalk particles fall off the tip before you even address the ball. A 20-30 degree upward angle keeps the compound on the tip face where it belongs.
Step 2: Angle of Application
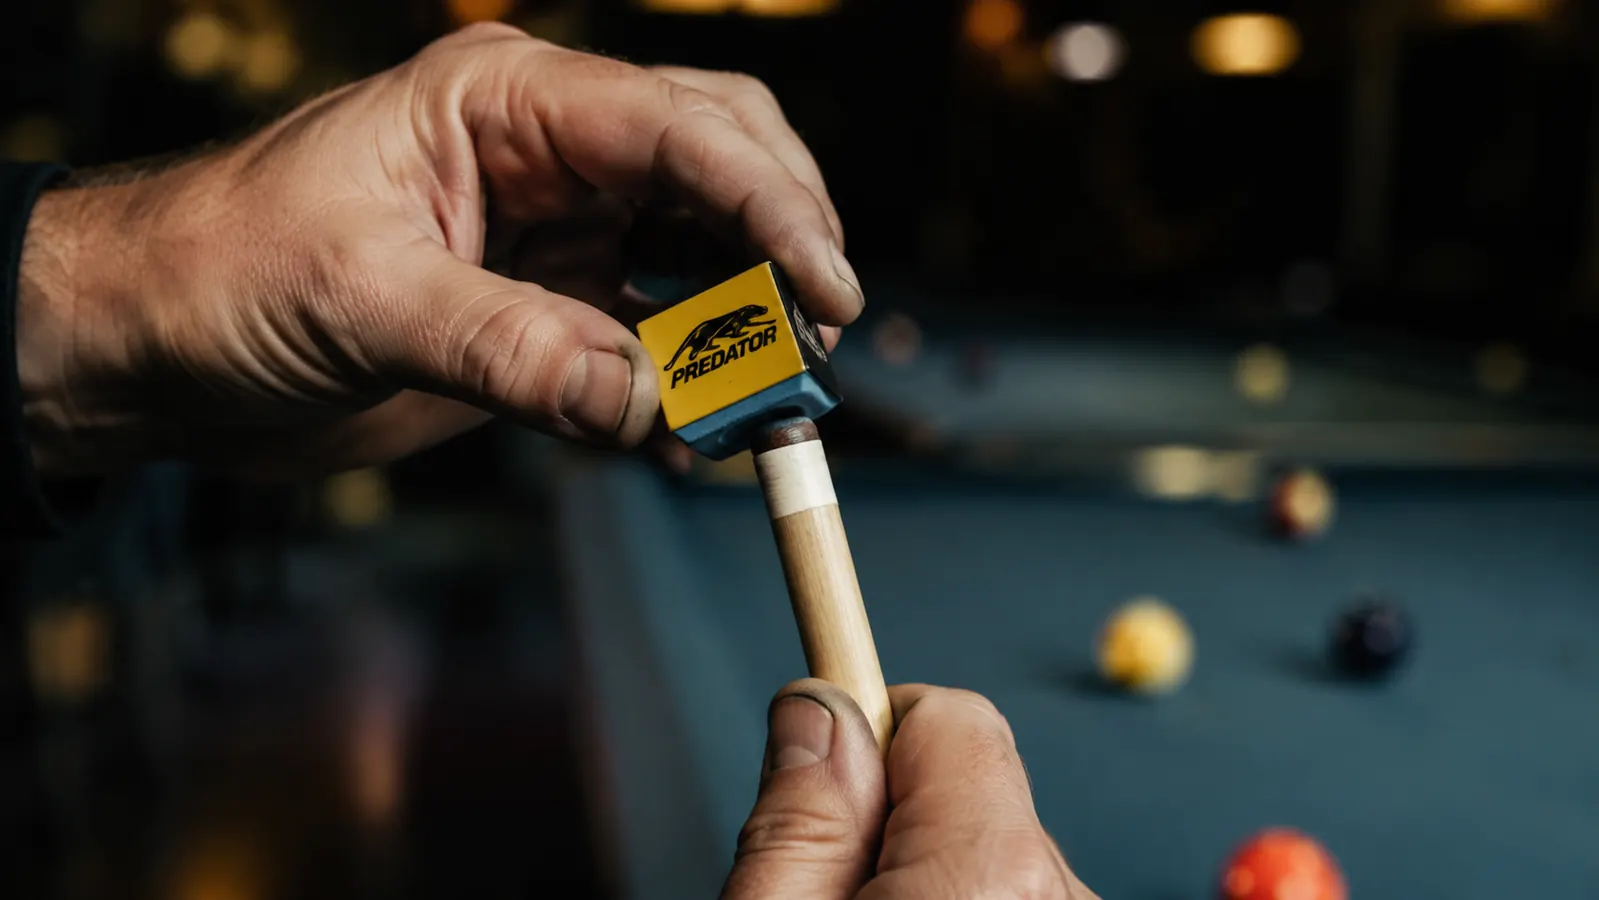
The chalk cube has a concave face for a reason. That dip is designed to match the slightly convex surface of a properly shaped cue tip. When you hold the cube at a slight downward angle and let it seat naturally against the tip, you get even coverage across the entire contact surface in a single pass.
The mistake I made for two years was holding the chalk too flat and then compensating by pressing harder. Harder pressure does not mean more coverage. It means you are grinding the surface of the cube flat instead of using that concave shape as a guide. Once you wear the cup out of your chalk cube, you lose the ability to cover the tip edges efficiently, and the edges are exactly where you lose the contact point on off-center shots.
Tilt the cube slightly in from the edge, let the worn face cup over the tip, and apply light, consistent pressure. One to two strokes is all it takes with a quality chalk. If you need five strokes to get coverage, the chalk compound is too hard for your tip.
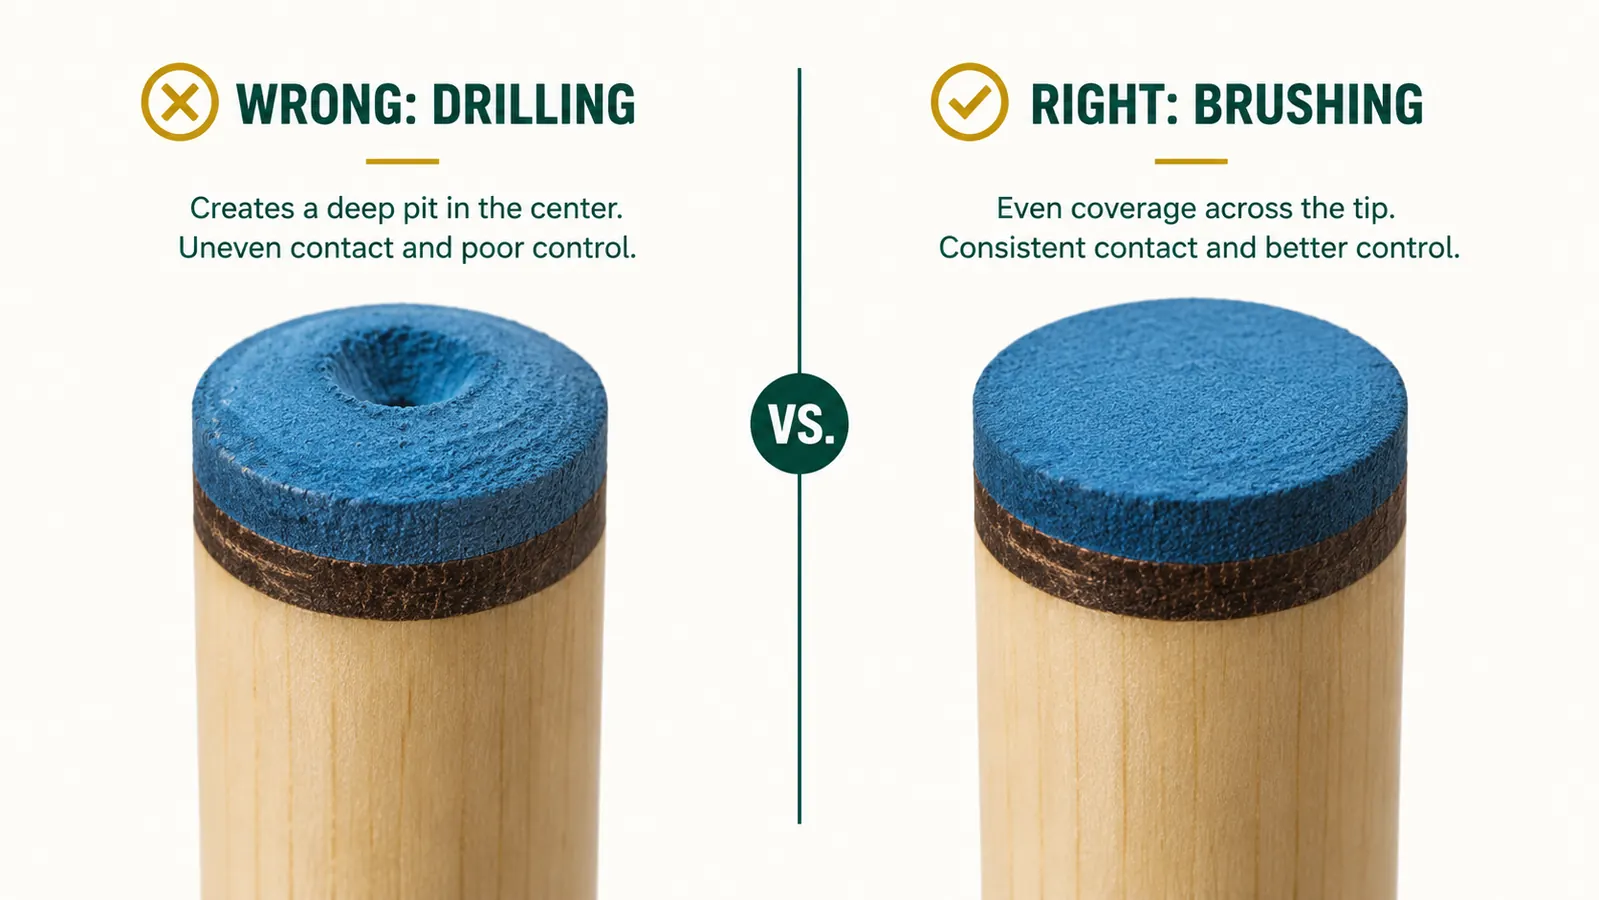
Step 3: The Brushing Motion, Not Drilling
This is the single most common technical error in pool, and it silently wrecks more tips than anything except bad tip tools. The drilling motion, rotating the chalk cube in circles against the tip, creates a center divot. Over time that divot becomes a pit. The edges of the tip stop getting coverage, you get inconsistent contact on english shots, and eventually the tip loses its shape and mushrooms.
The correct motion is a short, light brush stroke. Move the cube across the tip in one direction: left to right, right to left, or a slight arc that catches the full face. Then do one pass in the perpendicular direction if you want extra coverage. Two strokes, maybe three if the tip is dry. That is it. You are coating a surface, not shaping it.
After you chalk, blow lightly on the tip to remove any loose particles. Excess chalk sitting in a pile on the tip face transfers to the cue ball on contact, which creates the white chalk marks you see on the cue ball and can affect the cue ball's spin path on very fine shots. A thin, even coating is the target.
Step 4: How Often to Chalk
Chalk before every shot. Not every other shot, not only when you remember, and not only when you miss. The rule is simple: if you pick up the cue to shoot, you chalk first. There is no such thing as over-chalking in terms of frequency. You can over-apply chalk in terms of volume per stroke, but applying chalk before every shot is the standard at every level of play.
The reason is physics. Each shot makes contact between the tip and the cue ball at a single point. That contact scuffs the chalk off. By the next shot, the contact surface is already compromised. On a center-ball hit with a soft, accurate stroke, you might get away with skipping a chalk application. On a draw shot, a hard follow, or any shot where you are hitting off-center for english, you will feel the consequence immediately.
Professionals chalk between every single shot. Recreational players who chalk every two or three shots miscue more and blame their stroke. Watch the players at your league night who almost never miscue. They chalk every time without exception, usually before they even begin their pre-shot routine.
Chalk before every shot. There is no such thing as over-chalking in terms of frequency, only over-applying per stroke. The professionals know this. They chalk every single time without thinking about it.
Step 5: When the Problem Is the Chalk, Not the Tip
If you are miscuing consistently despite proper technique and frequent chalking, the problem might be your chalk compound. Budget chalk cubes, the kind that comes in a pack of 12 for a few dollars, are made with a hard, dry compound that does not adhere to leather tips as well as premium chalk. You apply it, it looks blue on the tip, and one stroke later it is gone.
Here is a quick test. Apply your current chalk with a normal two-stroke brush motion. Then run your finger across the tip face. If the chalk smears off easily and your finger is coated blue, the compound is too powdery for reliable adhesion. Premium chalk like Predator leaves a thin, slightly tacky coating that stays put under a full stroke. The compound is softer and binds to the leather rather than sitting on top of it.
There are also cases where the tip is genuinely the problem: a tip that has become too hard, a tip that has mushroomed out at the edges and lost its dome shape, or a tip that is glazed over from heat and friction. If your chalk passes the finger test but you are still miscuing, scuff the tip lightly with a tip tool or fine sandpaper to re-open the surface. A glazed tip repels chalk the same way a dirty windshield repels water.
Step 6: Choosing the Right Chalk
Not all chalk is created equal, and the compound matters more than most recreational players realize. The two most common choices at the amateur level are Master chalk and Predator chalk. Master is the blue cube you find in almost every pool hall and bar league. It works, it is cheap, and it gets the job done on center-ball shots. The problem is the hard, dry compound: on shots that require precise english, it can fail mid-stroke.
Predator chalk is different. The compound is noticeably softer and applies with less pressure. It adheres better to medium and hard tips, which is the range most league cues fall into. It also lasts longer per cube because you are applying less per stroke. A single cube of Predator takes me through two to three league sessions before it is down to a nub. With budget chalk I was burning through one cube per night.
There are other premium options worth knowing. Brunswick Centennial chalk is a long-time favorite at BCA events. Blue Diamond is what a lot of serious players use on low-deflection shafts because the adhesion is exceptional. Kamui chalk, the burgundy cube, is the most expensive option and is designed specifically for Kamui tips. For most league players on a standard maple shaft with a medium leather tip, Predator hits the right balance of performance and cost. It is meaningfully better than budget chalk and does not require you to own a $1,000 cue to justify it.
One note on chalk storage: keep your cube in a small sealed bag or a chalk holder, not loose in the bottom of your cue bag. Chalk absorbs moisture, and once it starts to crumble, the compound breaks down unevenly. A crumbling cube wastes material and leaves inconsistent coverage. Most hard cases come with a small chalk pocket built into the interior. Use it.
What Else Helps
Chalking correctly is the foundation, but there are a few things that make the whole system work better. First, maintain your tip shape. A nickel radius is the standard for most playing cues: not perfectly flat, not a sharp dome. If your tip flattens out over time, chalk coverage becomes inconsistent because you are making contact with a larger flat surface on center-ball shots and losing edge contact on offset hits. A tip tool costs a few dollars and takes thirty seconds to use.
Second, clean your tip every few sessions. Chalk builds up in layers, and eventually that buildup becomes compressed and hard. A quick scuff with a tip file brings the surface back to life. You will notice the chalk adheres better immediately. Third, if you are playing on an unfamiliar table with house cues and budget chalk, chalk up twice before your first shot. House chalk is almost always the hardest, driest compound available, and house cue tips are typically in rough shape. Double application is not a miscue fix, but it buys you better coverage on that first stroke.
If you want to go deeper on why chalk quality matters at the compound level, the article on how Predator chalk reduces miscues in league play walks through the adhesion difference in more detail, including side-by-side shot tracking over 500 strokes per cube. The piece on ten ways bad chalk costs you shots covers what happens at the tip level when the compound fails mid-stroke, which is useful if you are still troubleshooting a miscue issue after trying these technique fixes.
Switch the chalk first. You might not need to fix your stroke at all.
Predator Chalk has 4.7 stars from over 6,600 ratings. The softer compound adheres to standard leather tips in one or two brush strokes and stays put through the full stroke. Frequently used by league players who want premium chalk without a premium cue budget. Check today's price and availability on Amazon.
Amazon Check Today's Price on Amazon →